Colour Grading Using Curves and Levels For Anime Style Background Art

In this quick tutorial, I will be showing you some basic information on colour grading. The result image which later can be use for paint over into an anime style background.
What Is Colour Grading?
Color grading is the process of improving the appearance of an image through the use of different colour adjustment tools such as curves, levels, photo filter and etc.Colour Grading and Anime Style
Anime background arts are usually more vibrance and saturate. Sometime, adjusting saturation or vibrance on an image is not enough as we want to achieve a different style on the photo.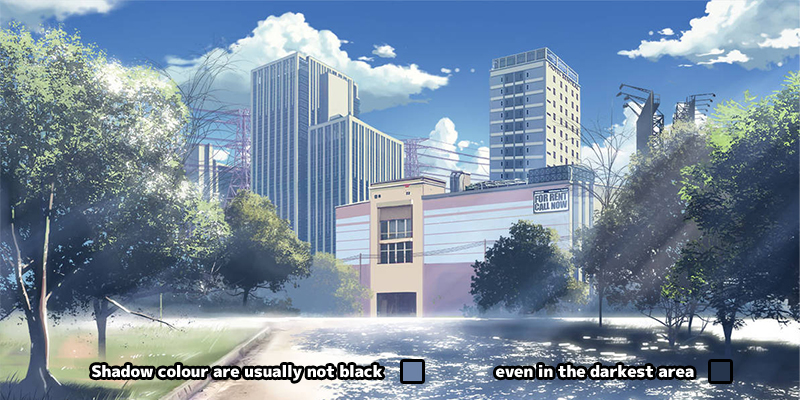
For example, shadows in a lot of anime background arts are more blue so we will want to boost cyan or blue colour in the shadow.
More info on What is shadow colour?
Shadows, Midtones, and Highlights
Highlights are the brightest area in an image as that receive the most light while shadows are the darkest area. Midtones are the area in between highlights and shadows. It is important to know how to adjust these areas through the use of curves or levels tool, so lets look at the image below.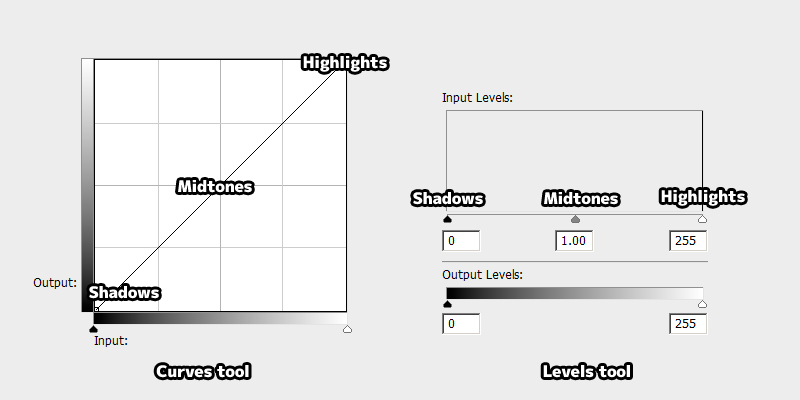
By dragging the little arrow on the specific area, we will be able to adjust the image tonality. You might notice there are options like Output and Input as well.
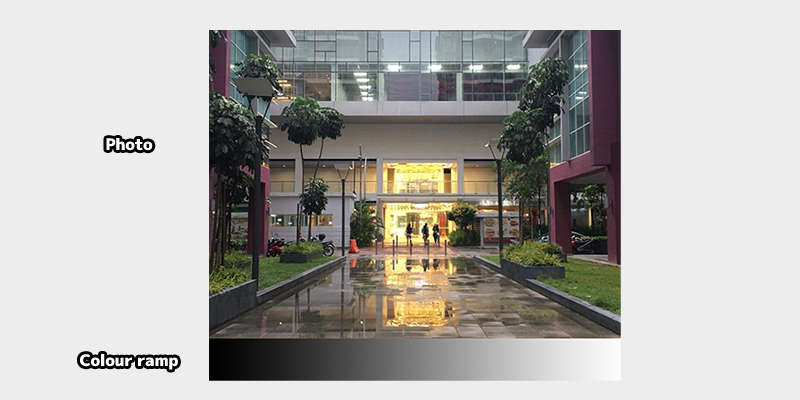
We will be using this photo and the colour ramp as an example to get an better understanding how adjusting Input and Output affect an image.
Adjusting the Input
First we will experiment by adjusting the Input option. Pay close attention to the colour ramp.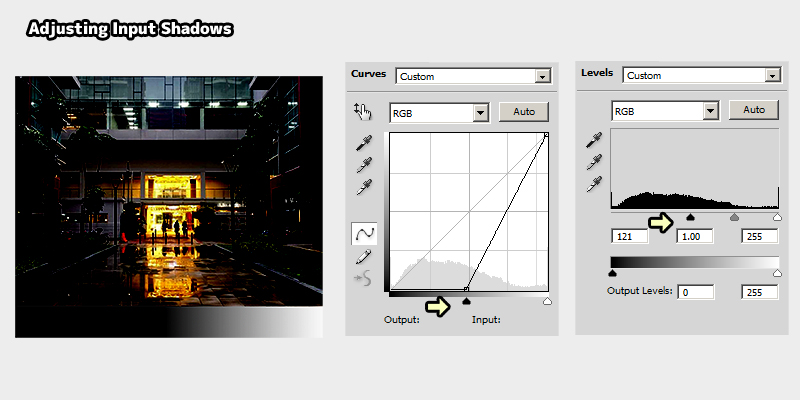
Adjusting the Shadows Input will darken all the pixels in shadows area. In photography and colour grading for film, people usually call this "crush the blacks".
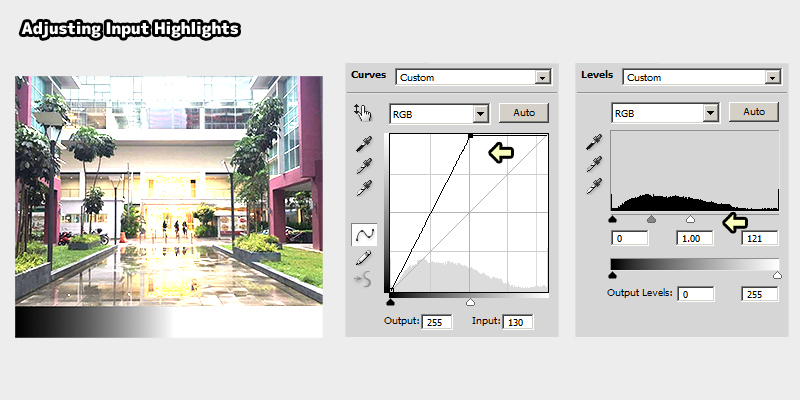
Adjusting the Highlights Input will brighten all the pixels in highlights area. Making the photo overexpose.
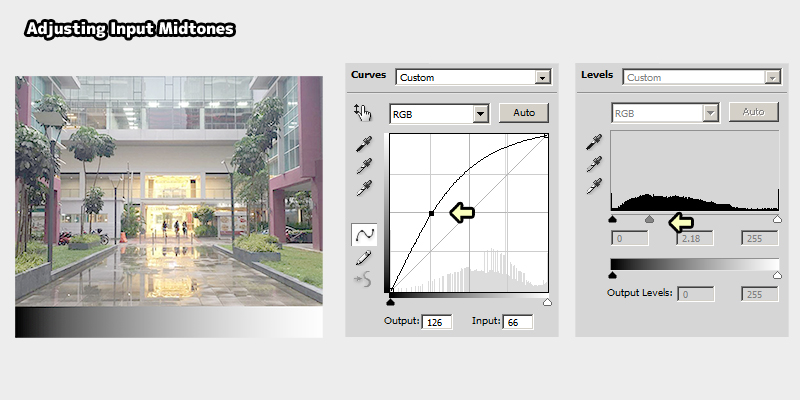
Pulling the Midtones arrow to the left reduce contrast, making the overall photo brighther.

Pulling the Midtones arrow to the right increase contrast, making the overall photo darker.
Adjusting the Output
Lets experiment adjusting the Output option now. Again, pay close attention to the colour ramp.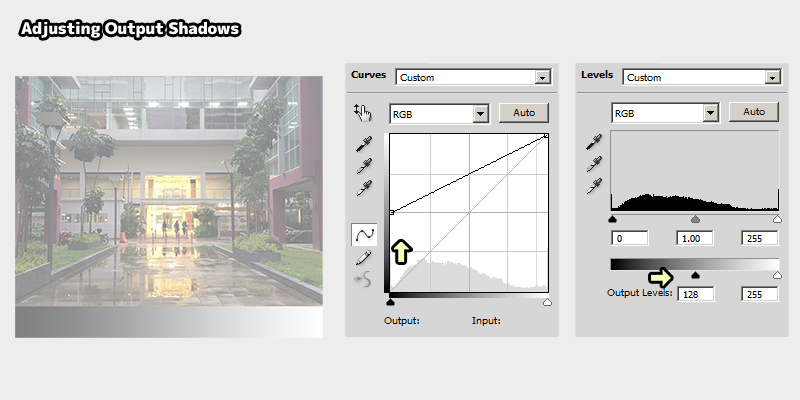
Adjusting the Shadows Output will clip away the darkest value.

Adjusting the Highlights Output will clip away the brighthest value.
There is no option to adjust the Output Midtones using Levels tool as we can't really clip away value between brighthest and darkest pixel. Adjusting the Output Midtones in Curves tool are actually just same with adjusting the Midtones Input.
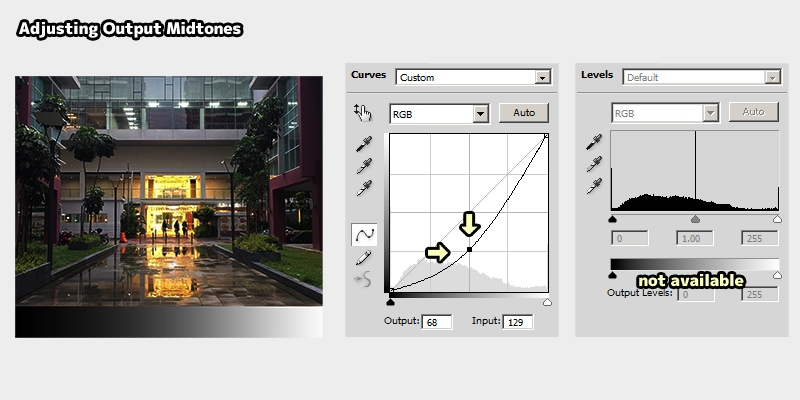
Pulling the Midtones arrow down is same with pulling the Midtone arrow to the right, which increase contrast.
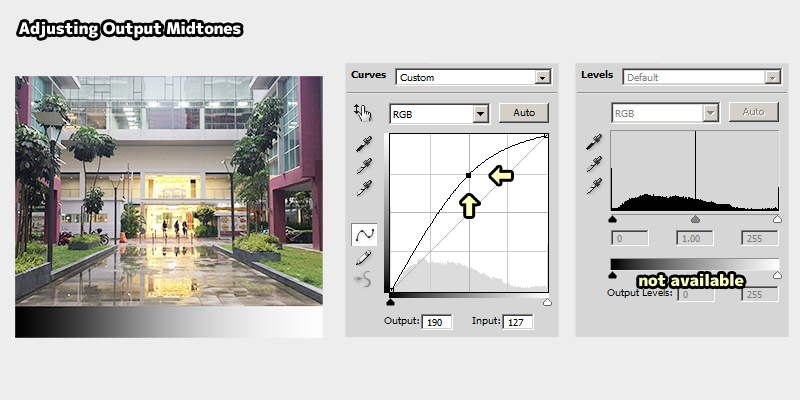
Pulling the Midtones arrow up is same with pulling the Midtone arrow to the left, which reduce contrast.
Colour channel
The examples above are just showing basic adjustment on all RGB channel as a whole. With Curves and Levels tool, we can also go into individual RGB channel for adjustment. This is how we boost or reduce certain colours in an image.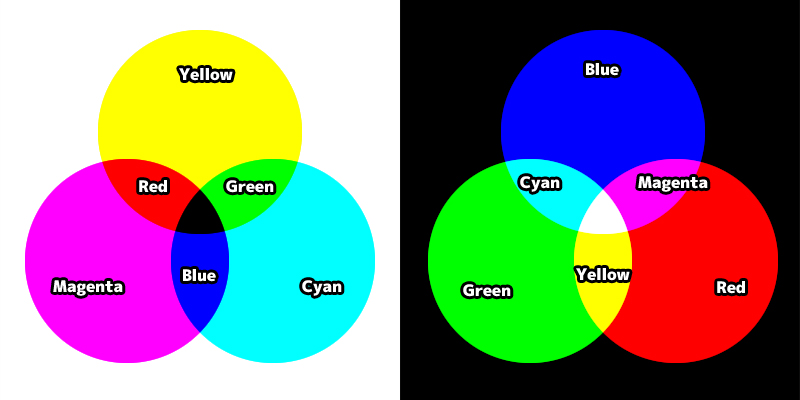
When we are adjusting the individual channel, we have to understand that each RGB colour has an opposite CMY colour.
- Red opposite colour is Cyan
- Green opposite colour is Magenta
- Blue opposite colour is Yellow
For example, we are able to adjust both blue and yellow colour in Blue Channel. If we increase the intensity of blue in Shadows, the image will be more blue in Shadows. But if we reduce the intensity of blue colour in Shadows, the Shadows in our image will be more intense in the opposite colour which is yellow. Sound confusing? Don't worry. Lets look at the image below.

In the image above, we can see RGB colour and their opposite CMY colour in Curves tool. Moving Shadows, Midtones or Highlights into the colour zone will increase intensity of the colour. For example, to increase blue in Shadows, we move the Shadows arrow into the blue zone under Blue Channel.
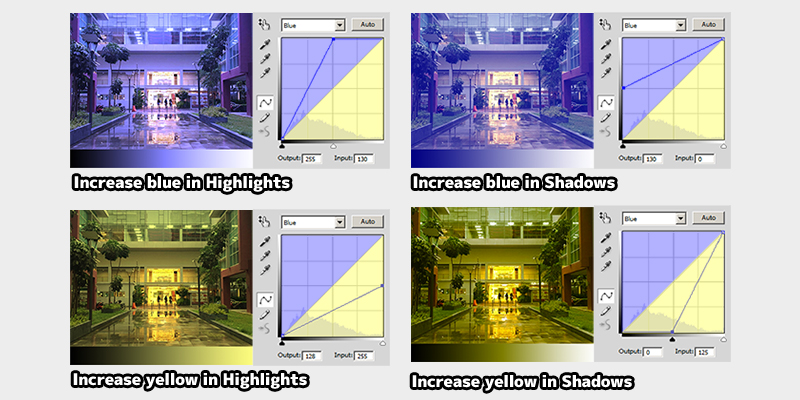
Image above showing various adjustment on Shadows and Highlights under Blue Channel, resulting in a more blue or yellow tint image depending on the Curves settings.

And this image I had increase blue in Shadows and yellow in highlights.
Curves and Levels Tool Cheat Sheet
I won't be able to go through all the RGB channel, so please use the image below as a reference or guide.
Adjusting Shadows and Highlights Input using Curves.
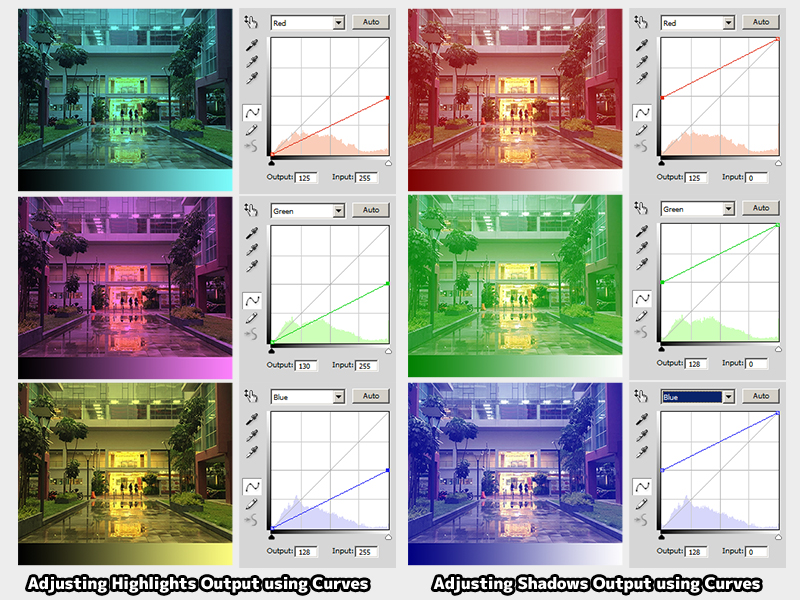
Adjusting Shadows and Highlights Output using Curves.

Adjusting Shadows and Highlights Input using Levels.
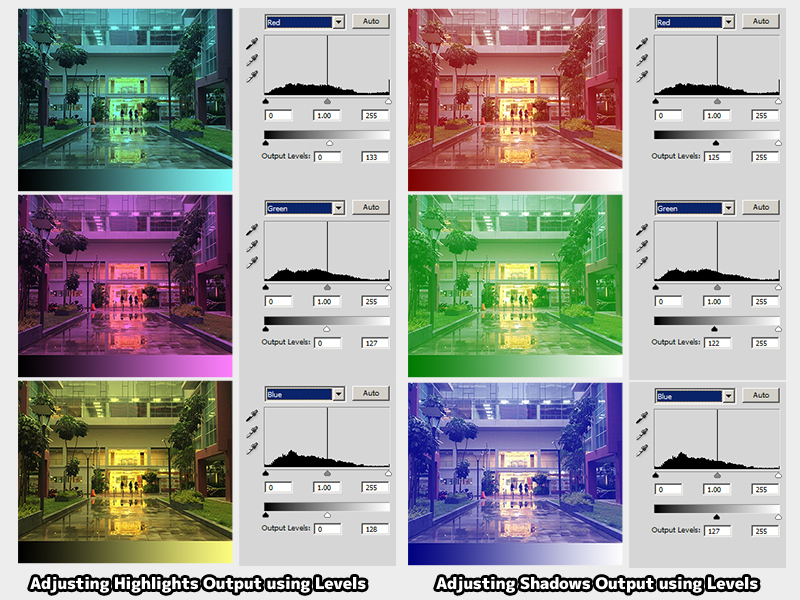
Adjusting Shadows and Highlights Output using Levels.
Difference between Curves and Levels Tool
You might be wondering what is the differences between Curves and Levels tool if both can produce the same result. One of the main different is we have more direct and easier control in using Curves such as producing the colour below.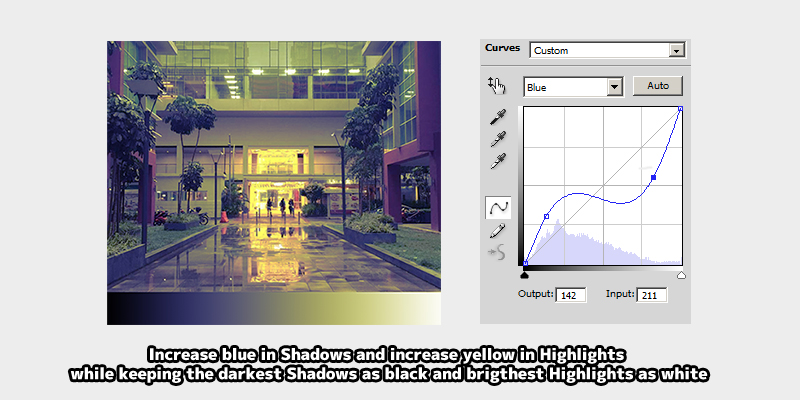
Increase blue in Shadows and increase yellow in Highlights while keeping the darkest Shadows as black and brigthest Highlights as white.
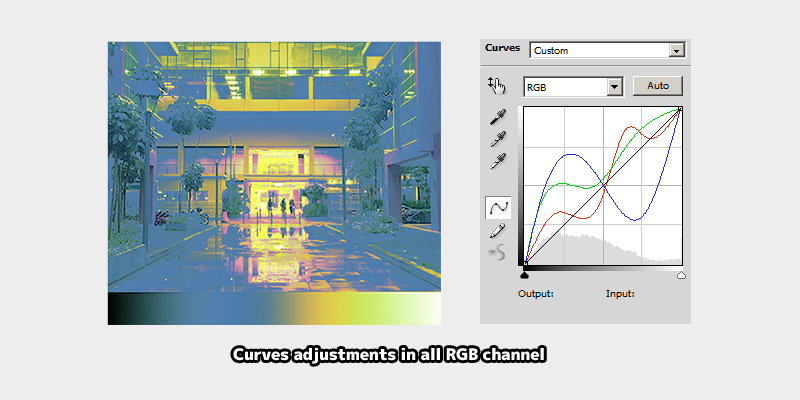
Extreme example of colour adjustment using Curves on all RGB channel.
Using Multiple Colour Adjustments and Layer Blending Modes
it is possible to use multiple Curves, Levels or any other Colour Adjustment tools in a single photo. Sometime, changing the layer opacity and blending mode will also give some interesting result.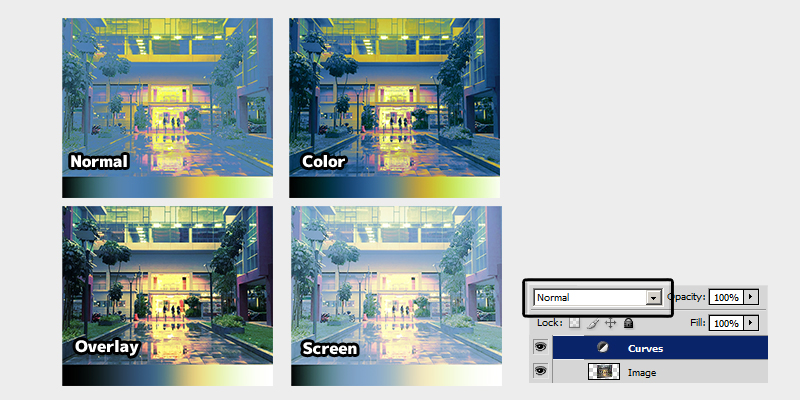
Image above show how different layer blending mode on Curves adjustment affect the final result.
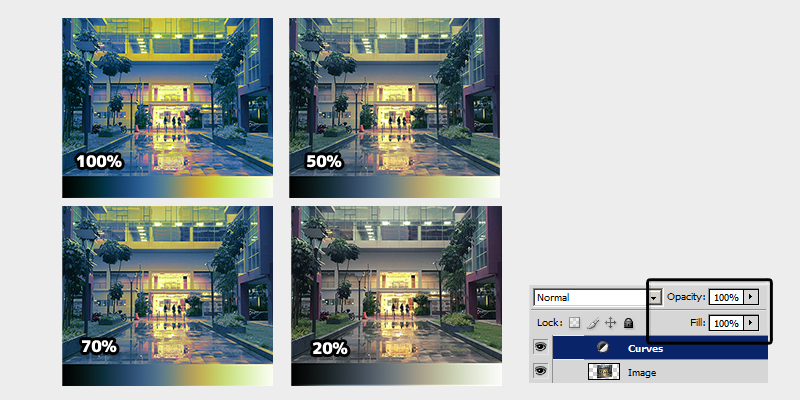
To quickly reduce the intensity of colour adjustment, we can reduce the opacity or fill on the Curves adjustment layer.
Example
Now we have go through the basics of Curves and Levels tool. It is time to apply what we had learn so far into some real example.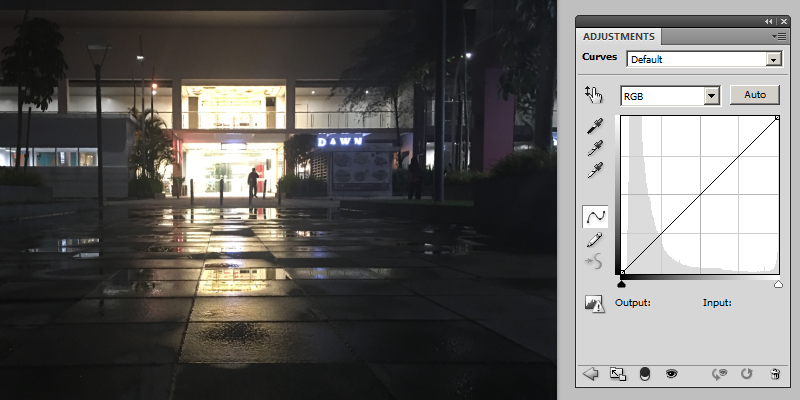
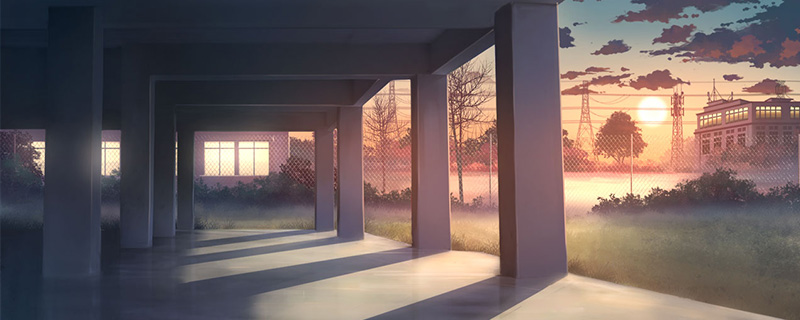
In this example, I am using a photo of the same location but in night settings. I will be adding more cold colours in Shadows while adding more warm colours in the Highlights.
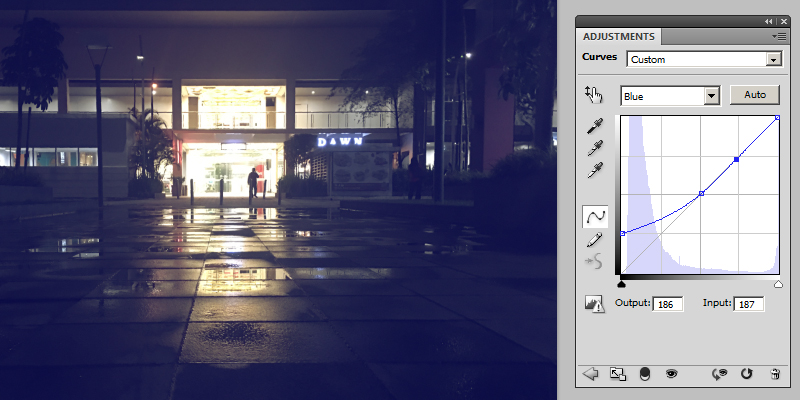
Step 1. Add a Curves adjustment and goes to Blue channel to add in some blue colour for Shadows.
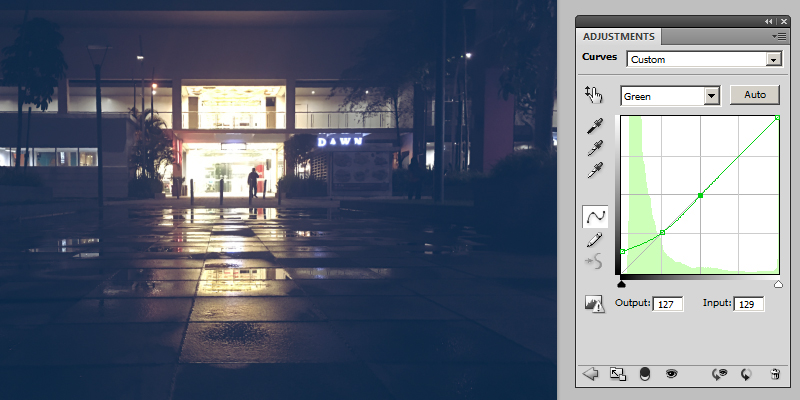
Step 2. To make the Shadows more closer to cyan colour, goes to Green channel and add in some green colour for Shadows,

Step 3. Goes to Red Channel, and add in red colour for the Highlights.

Step 4. Set Curves adjustment layer blending mode to Color.
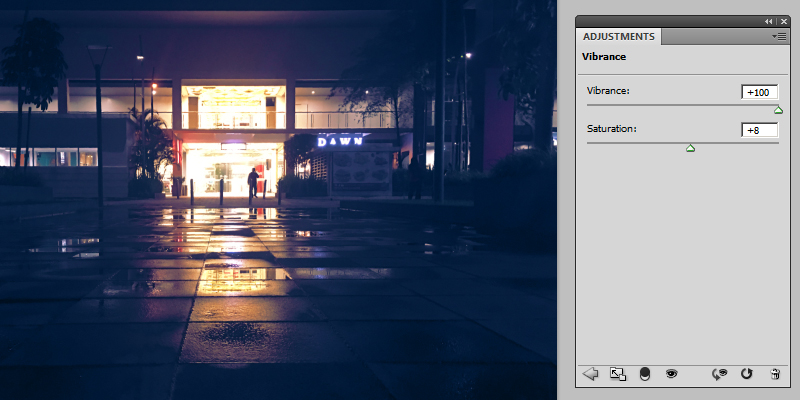
Step 5. Add a Vibrance adjustment layer and increase the vibrance. Adjust opacity of vibrance to 50 percent.
Video
A timelapse video showing the process of painting over photo into anime style background art.Final Word
Different photos require different settings to achieve different results. But the example above where I show boosting cold colour in the Shadows should be useful in a lot of cases for your painting. I will share more curves settings whenever I find some free time! Thanks!Reference
DeviantArt Shop Night ScenePixiv Shop Night Sceneh
Youtube Photoshop Anime Style Street Shop Night Scene
Very helpful! Thanks :3
ReplyDelete