Blender3D Toon Shader
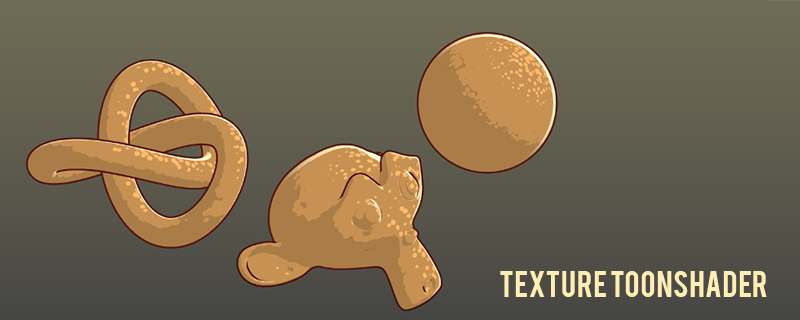
This is a simple tutorial on using color ramp to create Blender3D toon shader with rim light. Using procedural texture to "distort" the terminator line in toon shader will also give an interesting result. Quick way to add outline to the model is by using the solidify modifier.
Blender3D Texture Toon Shader
Below is a compilation of test shot I did using Blender3D internal render. Scroll down for tutorial!Toon Shader
Beside the default toon shader, we can create one from the default Diffuse Lambert by using Color Ramp.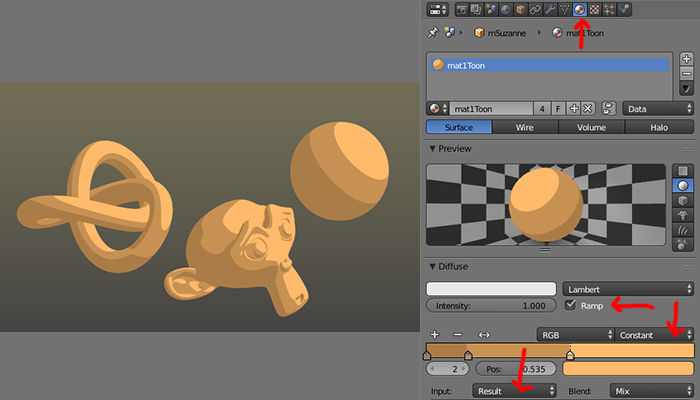
- Enable Ramp.
- Change Linear to Constant.
- Change Shader to Result.
This step can be done in the node using Converter > ColorRamp node too.
Texture Toon Shader
Adding texture to the material just now will create an interesting pattern on the toon shader!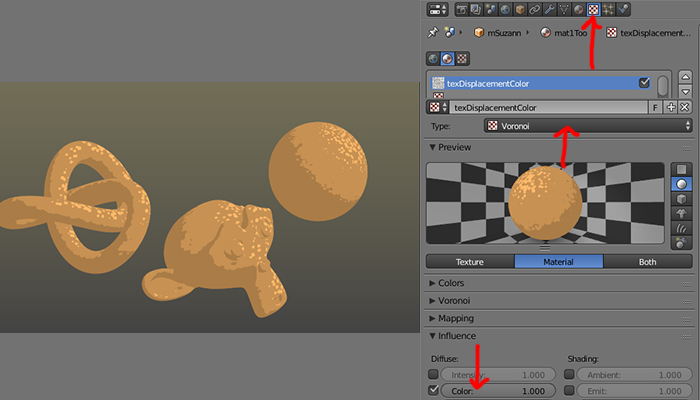
- Add a procedural texture to the same shader/material we just create.
- Voronoi will create this dotted pattern.
Rim Light
Rim light is another interesting feature to add on our toon shader rendering.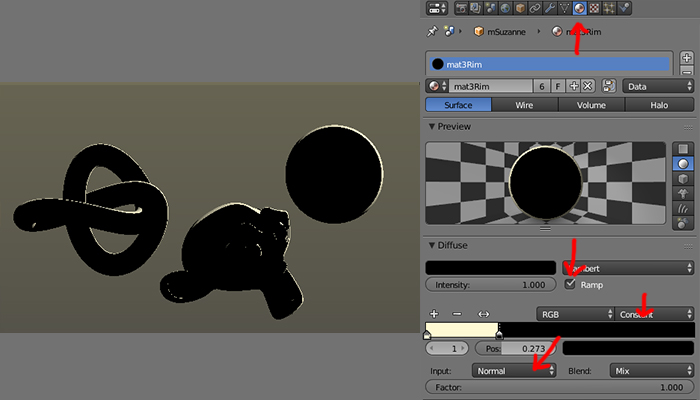
- Create another ColorRamp toon material.
- Enable Ramp.
- Change Linear to Constant.
- Change Shader to Normal.
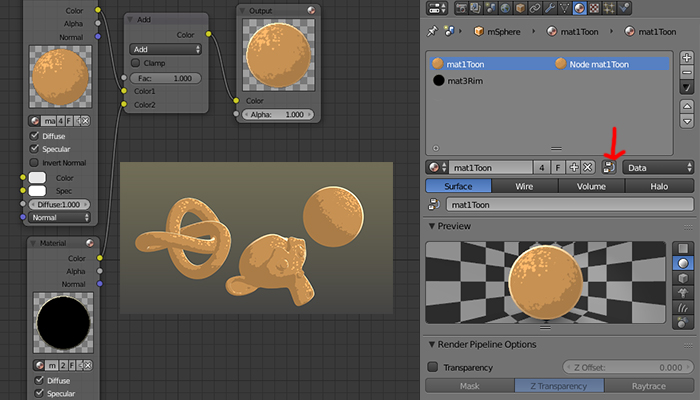
- Enable node setting for our first toon shader. (not the rimlight shader)
- Use (SHIFT-A) Color > MixRGB (ADD), node to setup the node tree.(Refer to image)
Rim Light
Outline can be render with Freestyle or using Solidify modifier.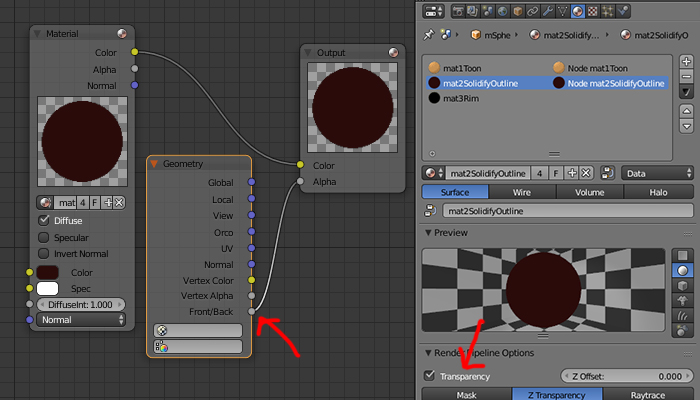
- Add another shader to our model. This will be the shader use for the outline.
- Enable Transparency
- Enable node setting for our outline shader.
- Plug (SHIFT-A)Input > Geometry (Front/Back), node to Output (Alpha).(Refer to image)
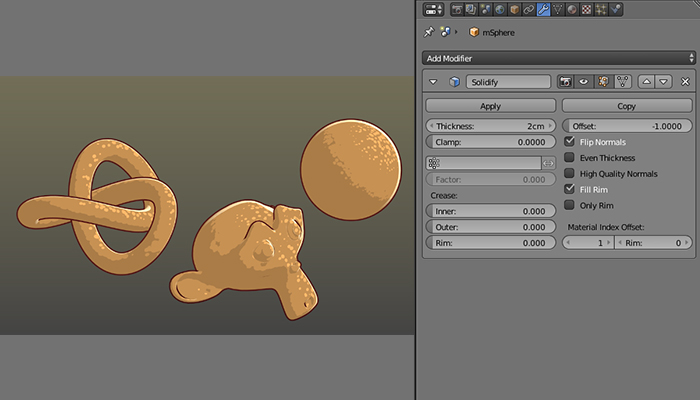
- Add Solidify modifier to our model.
- Set Material Index Offset number. This is base on the location of our outline shader. If it is the second one, set it to one because the sequence start at zero.
- Enable Flip Normals.
- Adjust Thickness.
For Freestyle outline render, you only need to enable it and play with it settings. But it is a whole big topic on it own, so I won't be showing them here.
Comments
Post a Comment