Anime Background Paint Over Photo
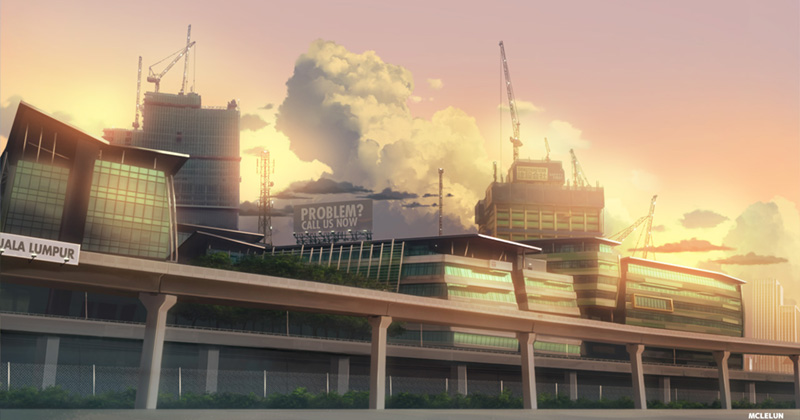
This tutorial will quickly discuss about the workflow of turning photo into anime style background using Photoshop.
Original Photo
This is the original photo I took with my camera phone, Nokia808.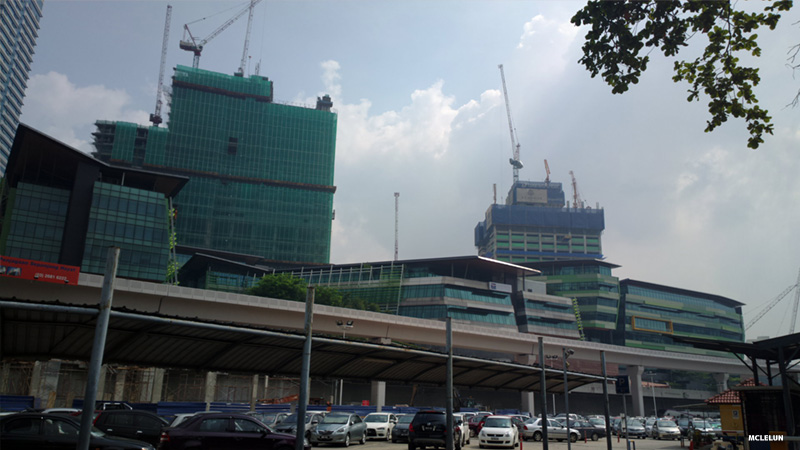
Scene Layers
Before painting, it is always better to seperate objects in the scene into different layers. Doing this will make the painting process easier. Layers are also important for parallax animation. Apply the layer mask when everything are final.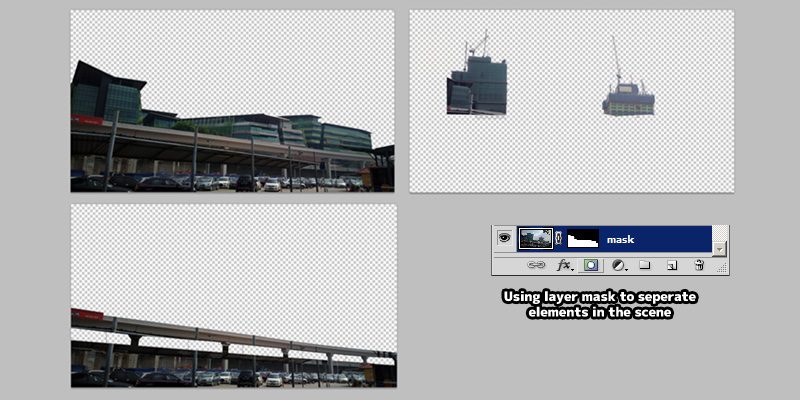
Notice how we also completely remove the sky as we going to paint them later.
Sky Colour
After separating all objects into layers and removing unwanted elements, add in the sky colour. Sky colour will tell us the time of the day, and set the overall ambient colour and mood. Use a soft round edge or gradient tool to paint the sky.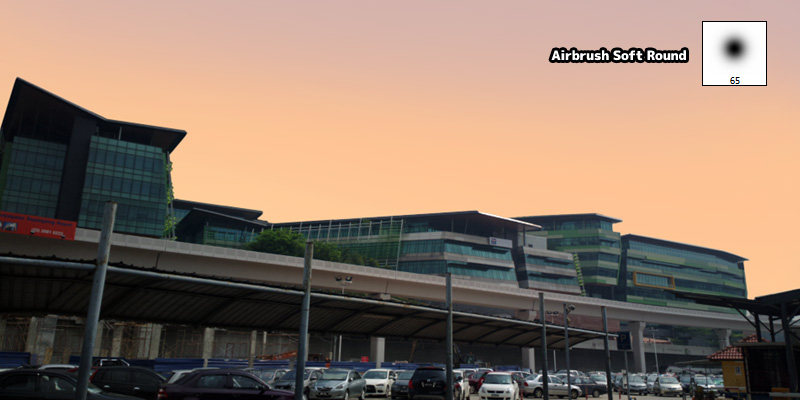
Color Grading
After setting the colours of sky, we can adjust the photo to match the sky color. Animation usually have more saturated colors. For example shadow are more blue, sun are more red and yellow. But since my photo are already quite dark and match the background quite well (I think? I am colorblind so I can't really tell), so I just did a small boost on saturation (CTRL-U).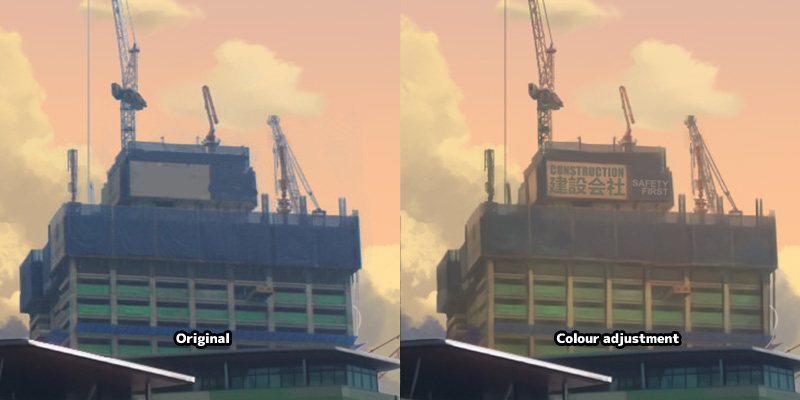
This distance building is a bit blue-ish for a warm sunset, so I adjust its hue to match the sky colour.
Painting Over Photo
Painting over photo is actually more simple than most people would have thought. We just need to color pick (ALT in brush mode) from the photo and paint over it. Keep on doing this, until we got that painterly feel for the artwork. In generall, we want to remove photo compression artifact and noise from the photo.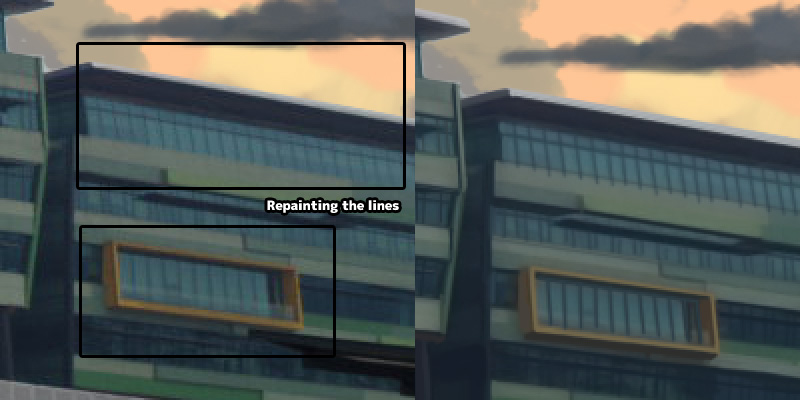
Sometimes photo are blur and we can repaint certain details . In this example, I am redrawing the window lines into the artwork.
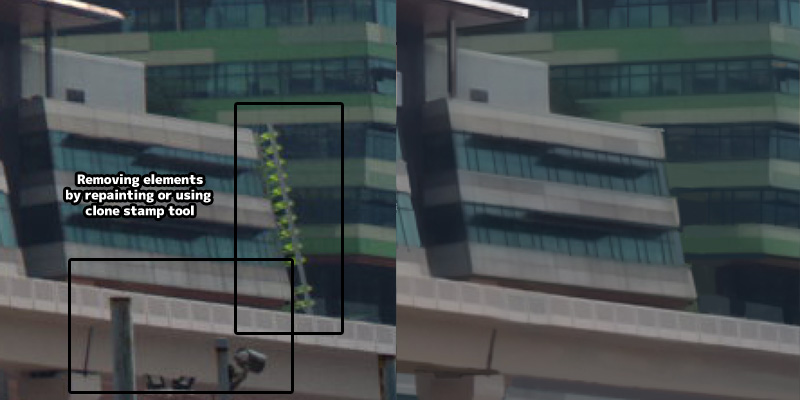
We might want to remove some unwanted objects in the photo as well. Do this by painting or using the clone stamp tool.
Painting Cloud
Cloud is better repaint from scratch to give the artwork a more painting feel. Since, I had mask the building earlier, so it is easier for me to paint the clouds behind the building.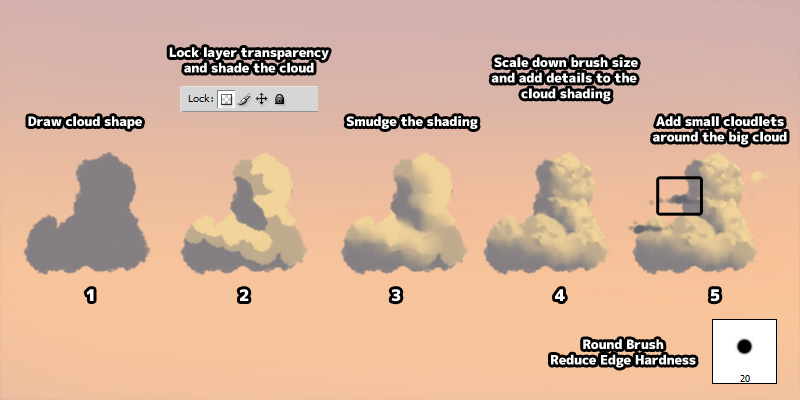
Quick step to paint clouds:
- Add a new layer, use round brush to paint the shape of cloud.
- Lock and preserve layer transparency, shade the cloud.
- Use smudge tool to smudge the shading
- Scale down brush tip and continue painting the cloud to add in smaller detail.
- Add in small clouds around the bigger clouds.
More Tutorial on anime cloud painting.
Painting Trees
Another area that I figure that is better to repaint from scratch are trees. Painting it into a simple two to three shades are good enough for a 2D anime background.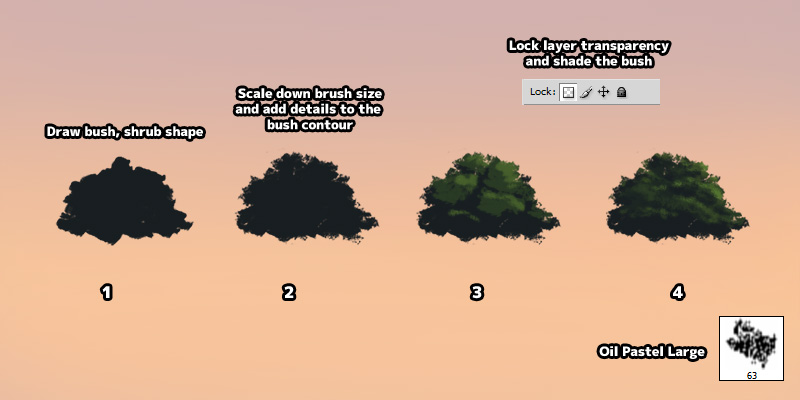
Quick step to paint trees:
- Use "Oil Pastel Large" to paint the tree shape / contour.
- Scale down brush tip to refine the shape further.
- Lock and preserve layer transparency, shade the tree.
- Furhter shading, we can use smudge tool for this step as well. But remember to repaint the details as smudge tool will usually blur the painting.
More Tutorial on anime tree painting.
Add in Extra Elements
Aside from what is in the original photo, we can in some extra objects to the artwork. We will need to paint over these objects too.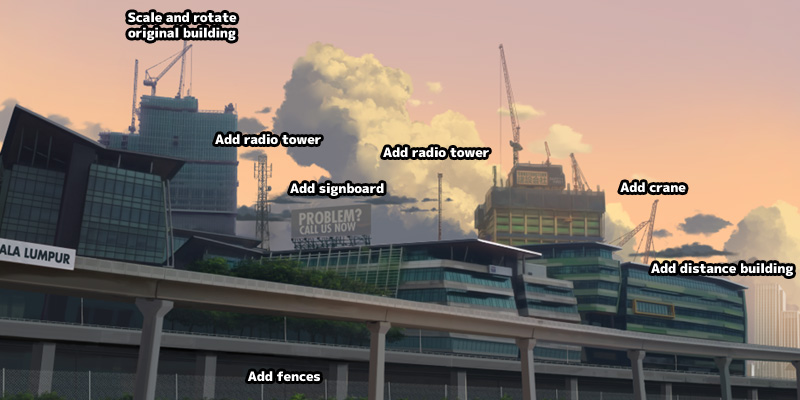
Painting Highlight and Bright Area
Add another layer and set it to any additive blend mode such as "Screen" or "Add". Then, start painting on area that is receiving and casting light.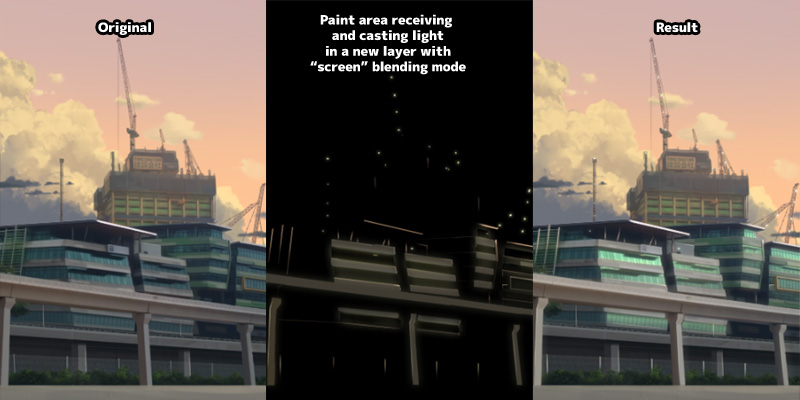
Sometime, we will want to add in the "Shadow" layer with multiply blend mode to paint the shadow.
Painting the Atmospheric Effect
Adding atmospheric effect like haze, flog or glow is the easiest way to add value to our artwork. Paint the glowing area with a soft airbrush in a additive blend mode layer.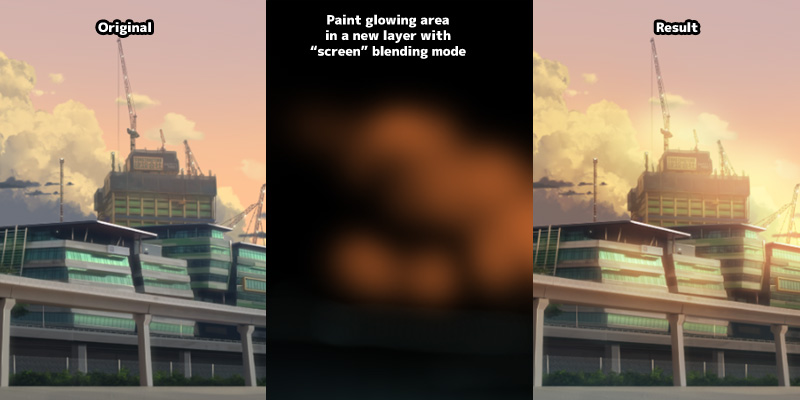
Before and After
This is the final result of the paint over, "KL Sentral Station".
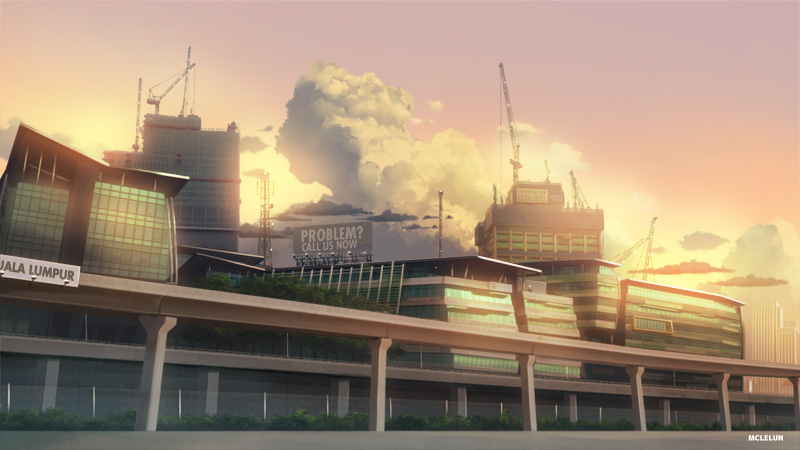
The more we practice, the more it will look painterly. So keep on painting!
Hi, this is a great tutorial!!!! Is it possible to download the original picture? For learning purposes.
ReplyDeleteAwesome work! fantastic tut!
ReplyDeleteeut! thanks!
ReplyDeleteim a newbie here and its really helpfull
You are literally a saint for giving us all these tutorials, Thank you so much!
ReplyDeleteThis was a life saver, thank you so much! <3
ReplyDelete